Import/Export Data
The Import/Export Data feature in Titan is extremely useful if you need to make changes to numerous pages. You can add, change, or remove things like page names, workstation names, URLs, URL aliases, short and long descriptions, and metatag keywords.
-
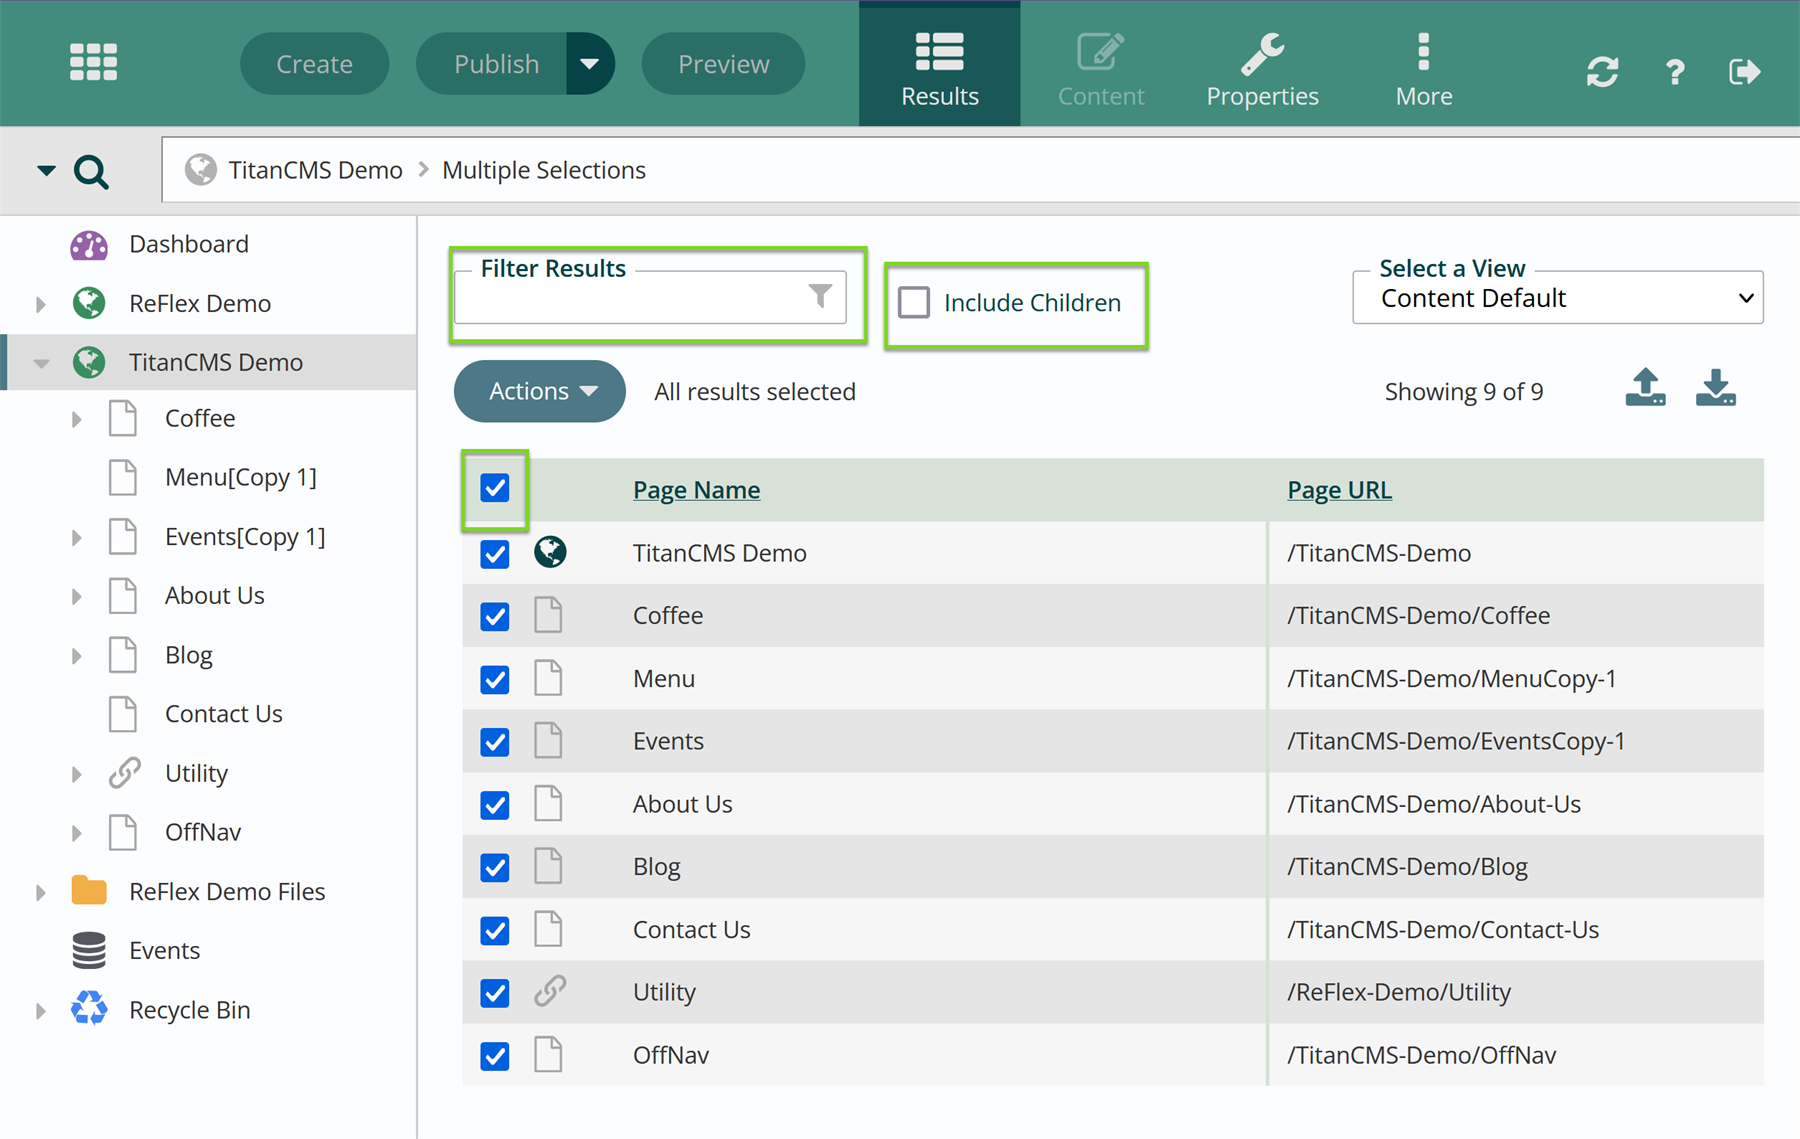
First, go to the source of the pages, images, or data you want to edit. Select “Include Children” in the main panel if you need pages that are more than one level down. Filter the results using the filter bar if necessary.
-
Once all relevant items are selected, select the view you need in the Select A View menu. Different views will give you different editable columns. For pages and files, the SEO Properties view has all columns that are configured in your site for import and export. For data nodes, the default view - [_x_] Info - will have all editable columns.

-
If none of the existing views fit your needs, create a new view. If you need to update a property that does not have a column in the Info or SEO Properties view, that will need to be configured in Admin.
-
Export the current data by clicking on the download results arrow in the upper right-hand corner.

-
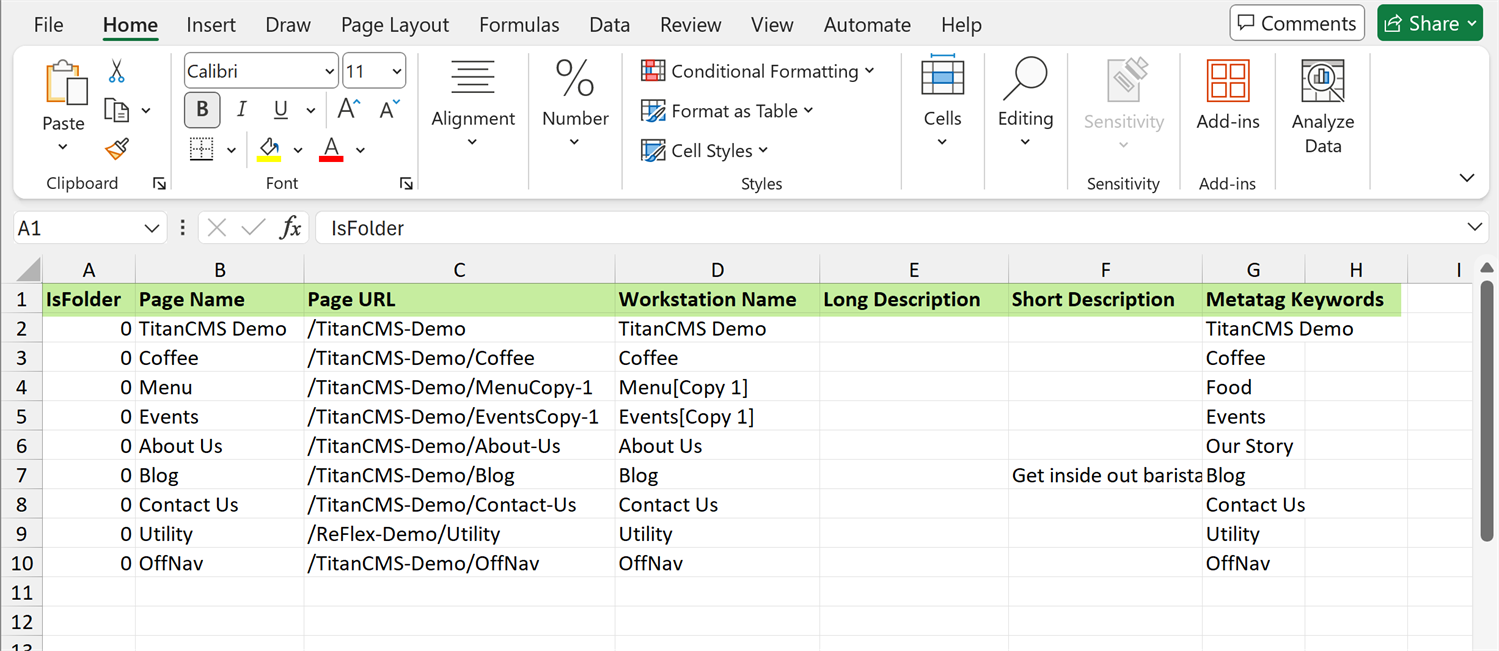
This will download all the data in an XLS format. Save this file to your computer and then open it in Excel.
-
DO NOT change the column header names or text formatting. You can resize the columns, and, if you’re changing URLs, you can add a column called “New URL” (case sensitive). Beyond that, only change the content of non-header cells. What columns exist depends on if you’re working on pages, images, or data nodes, and what view you have exported.
-
The only columns you must keep are Page URL and any columns in which you are changing information. You can, if desired, delete entire columns that you are not updating. As long as the full column is deleted – i.e. there is not just a header and then empty cell contents below the header – this will not affect the workstation items.
-
Make all changes needed. Save when you are done. If you’re updating URLs specifically, please see URL Aliases for more detailed information.
-
Upload the saved sheet using the upload results button.

-
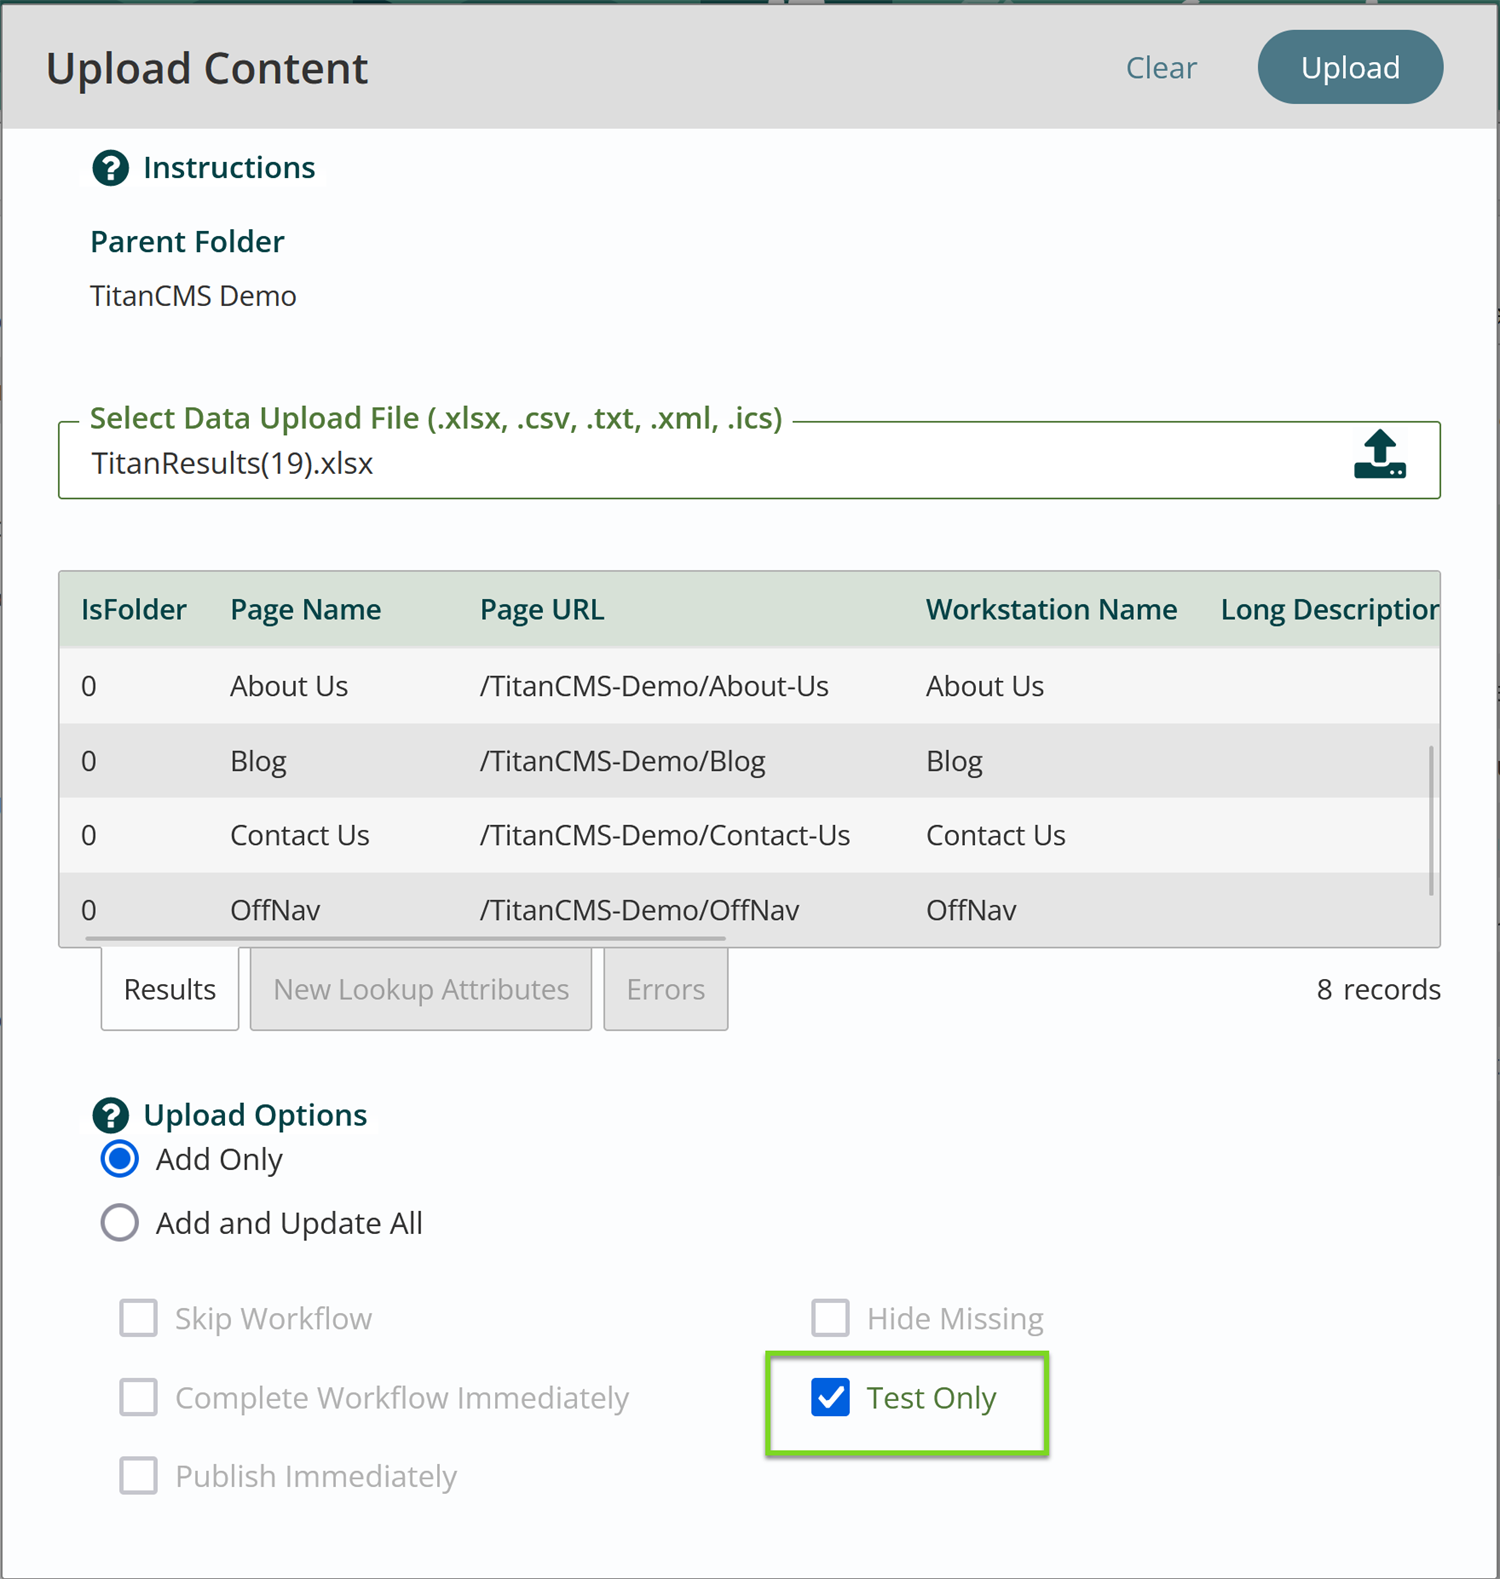
When you click this button, you will see the Upload Content popup. Click the upload icon, or anywhere in the Select Data Upload File bar.
-
We recommend you test your data before permanently uploading it to Titan CMS. You need to choose “Test Only” before you upload the data.
-
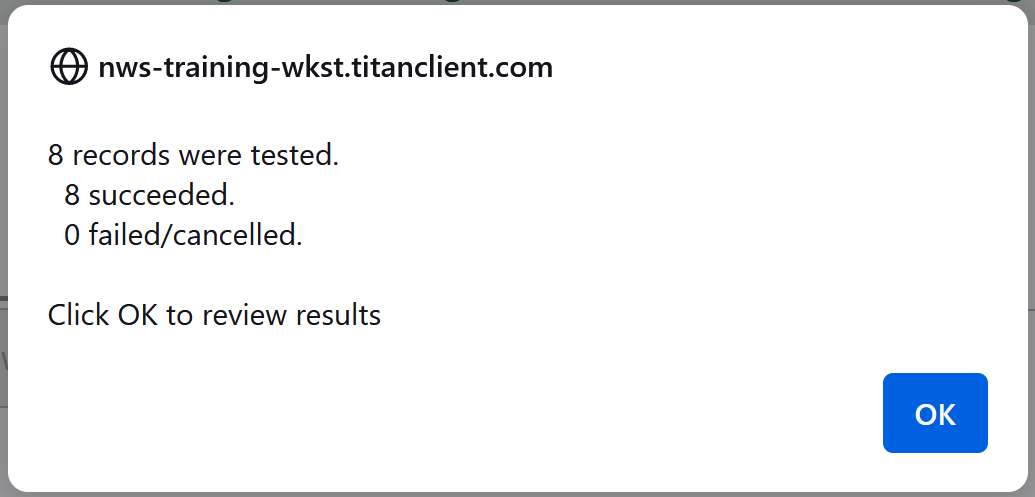
This will allow you to see how many records were tested, how many records succeeded, and how many failed.
-
Select “OK” to see which items were successfully uploaded and which ones failed.
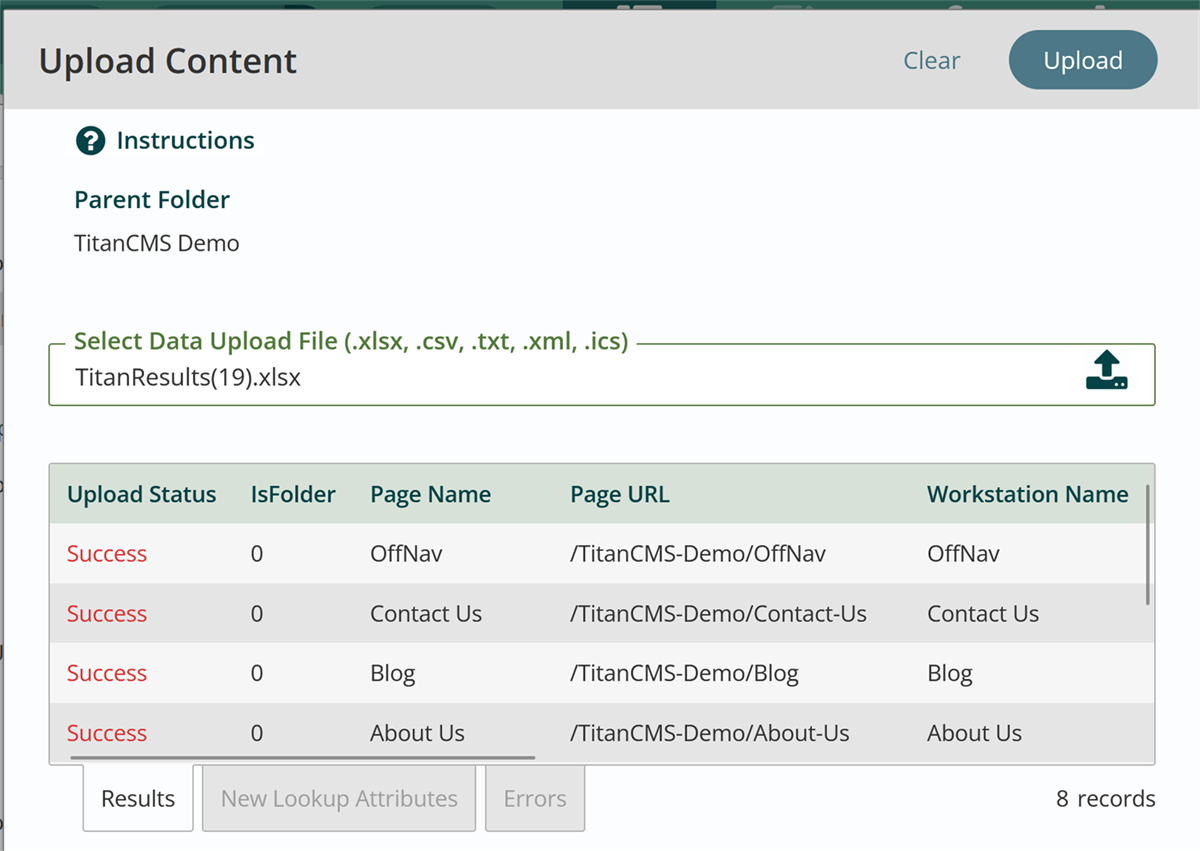
-
If everything looks good – you can upload the data, but this time do not select “test only”.
-
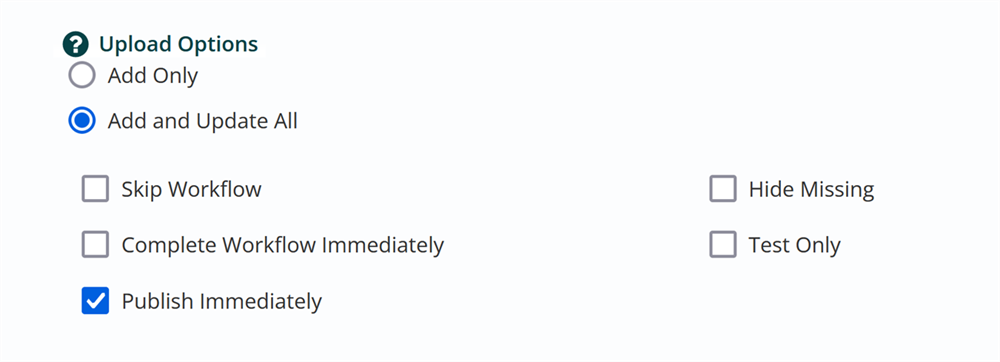
We recommended you use the “Add and Update All” selection with “Skip Workflow” selected. This will update the current version of a data item instead of creating a new version. Alternatively, we recommend “Publish Immediately” if you do not have a reason to review the pages before publishing. All upload options are explained here.
-
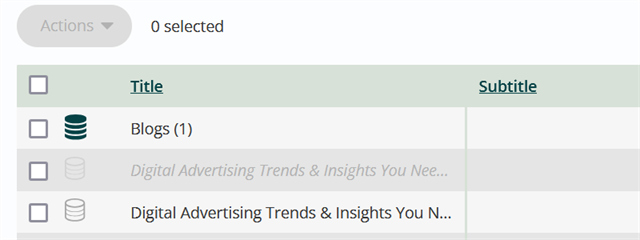
If you choose to also select "Hide Missing," any pages in the results set whose rows were deleted from the uploaded spreadsheet will be immediately hidden. They will not be deleted, but will appear greyed out and italicized in the workstation, and will not be viewable by the end user.
-
Hit Upload.
-
Once published, click in to any of the results to confirm your changes.
Get Support
Expert Titan CMS Support is just a phone call or email away!
Titan CMS Help Desk
9a.m.-5p.m. CT Mon-Fri
Tel: 414-914-9200
Email: support@nwsdigital.com

