Tags And Attributes Overview
Tags are used for organizing your pages, files and events into related terms. The tag values or attributes may be used in a filter list. This filter will assist your users in viewing pages on the website.
- Tag: Used to group these attributes together
- Attributes: Values that have a common theme
Tags are created in the Titan Administration Module and assigned to items in the Content Module to allow for filtering on the website.
Learn more about tags:
- Assign Tag Attributes to Content
- Add a Tag and Attributes
- Create an Attributes Group within a Tag
- Activate A Tag for a content site file pile or data site
Assign Tag Attributes to Content
To assign tag attributes to a page, data item, or file:
- In the Navigation Tree, go to the page, data item or file you need to update.
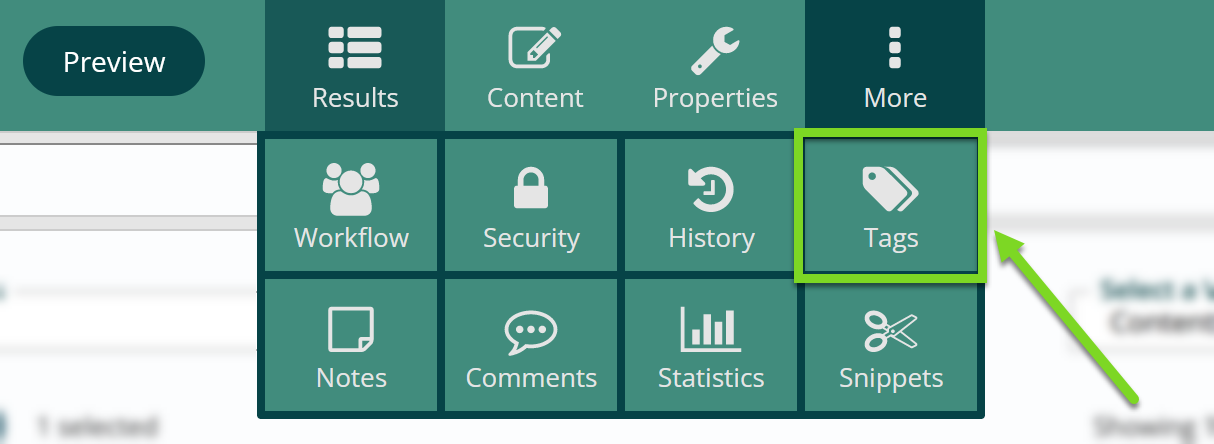
- Click on the Tags button in the App Ribbon.
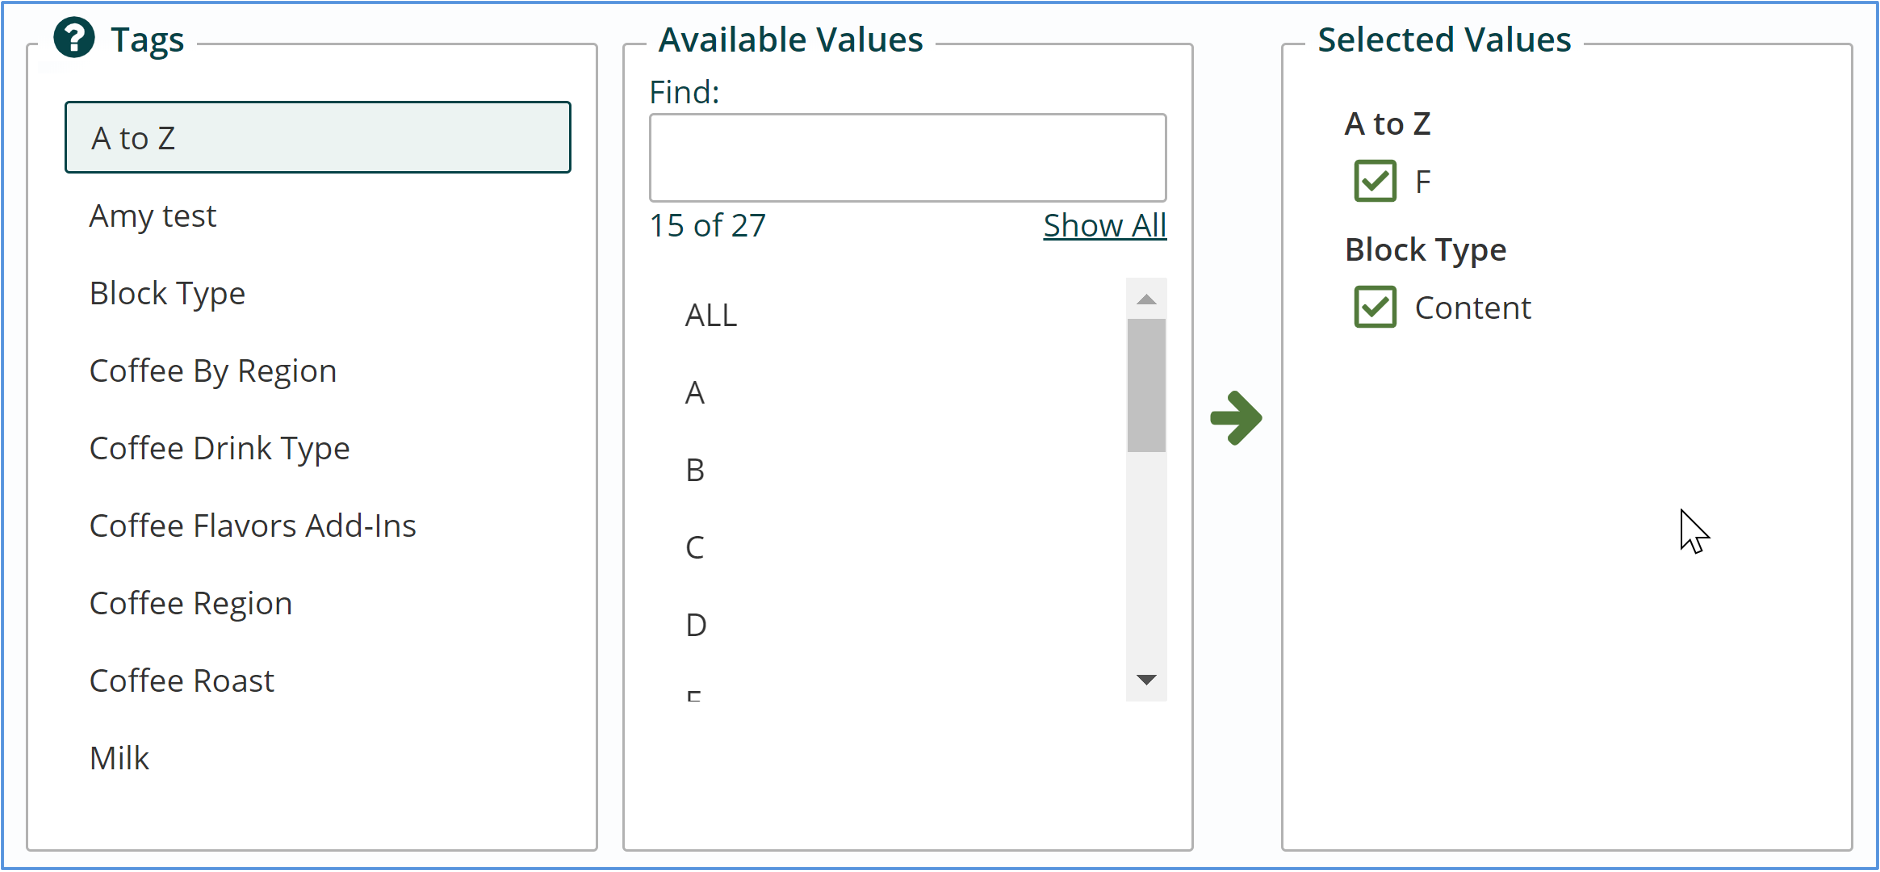
- Click on a Tag.
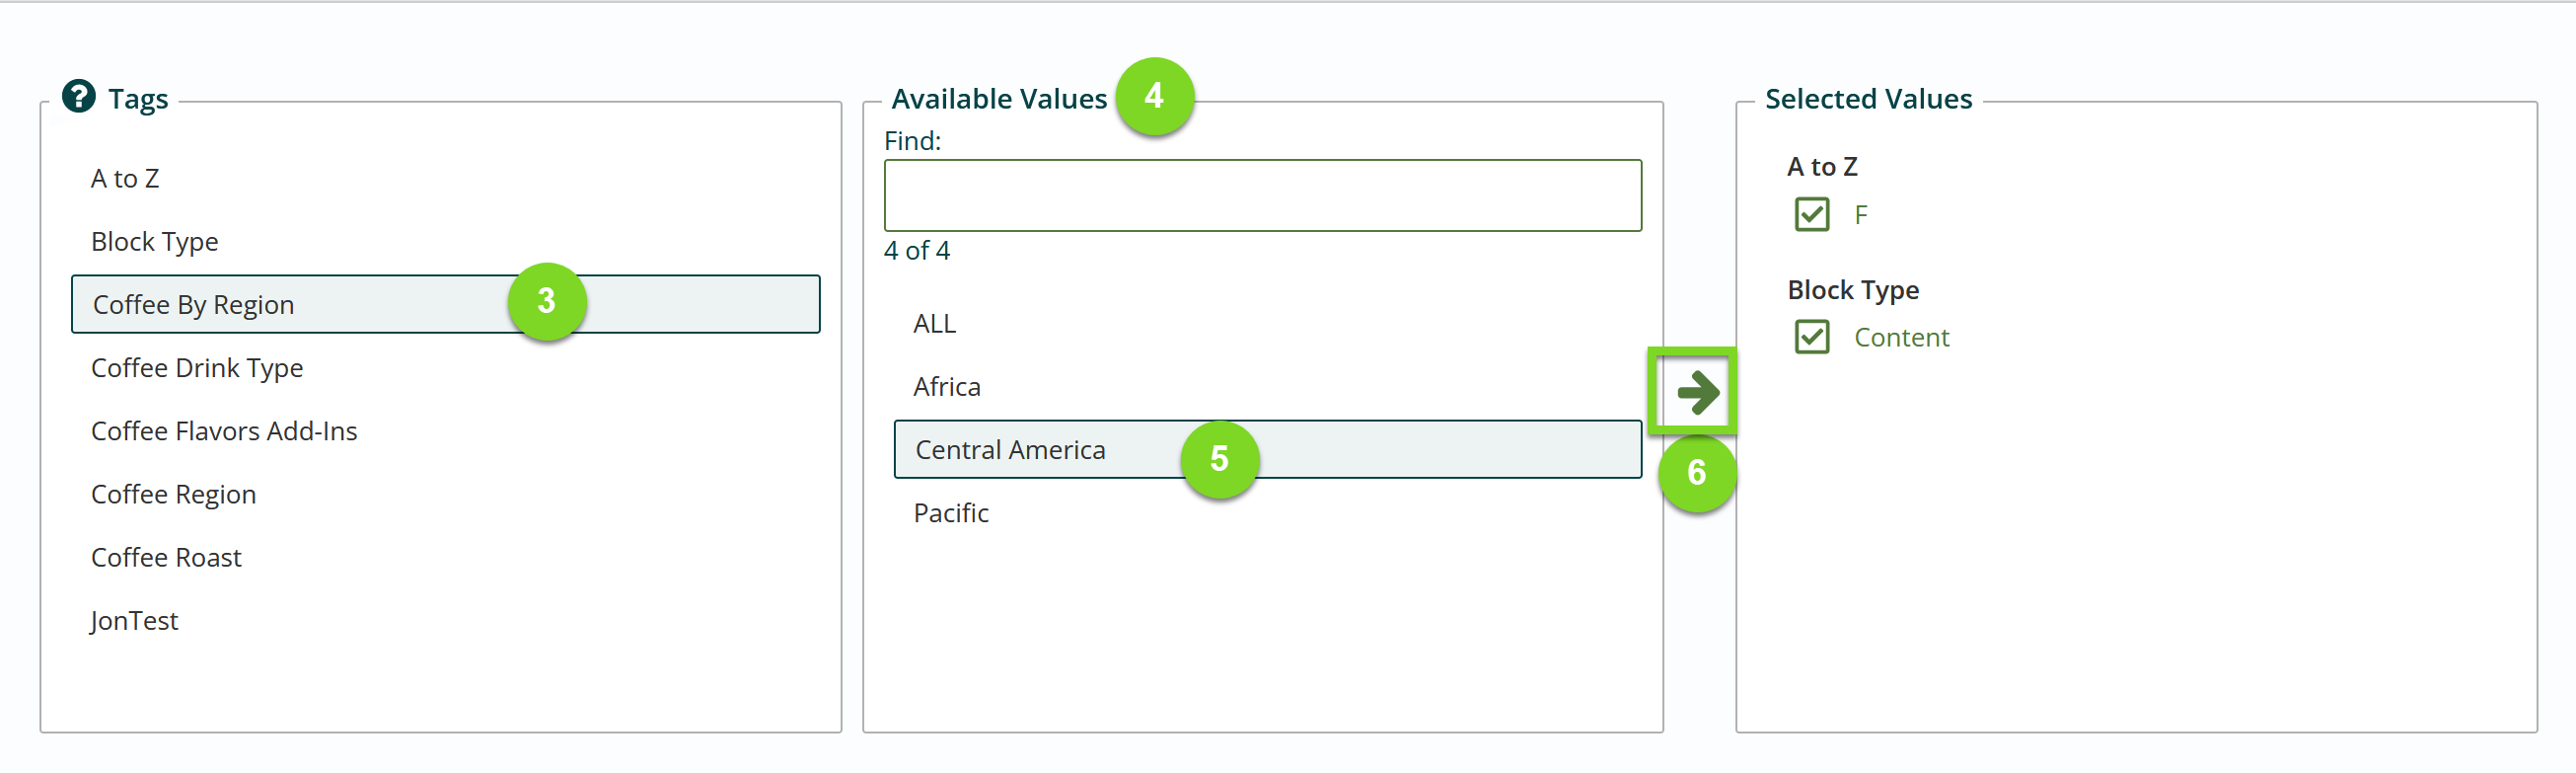
- The Tag and associated values will display. (If the tag or value you are looking for is not present, add it to the workstation.)
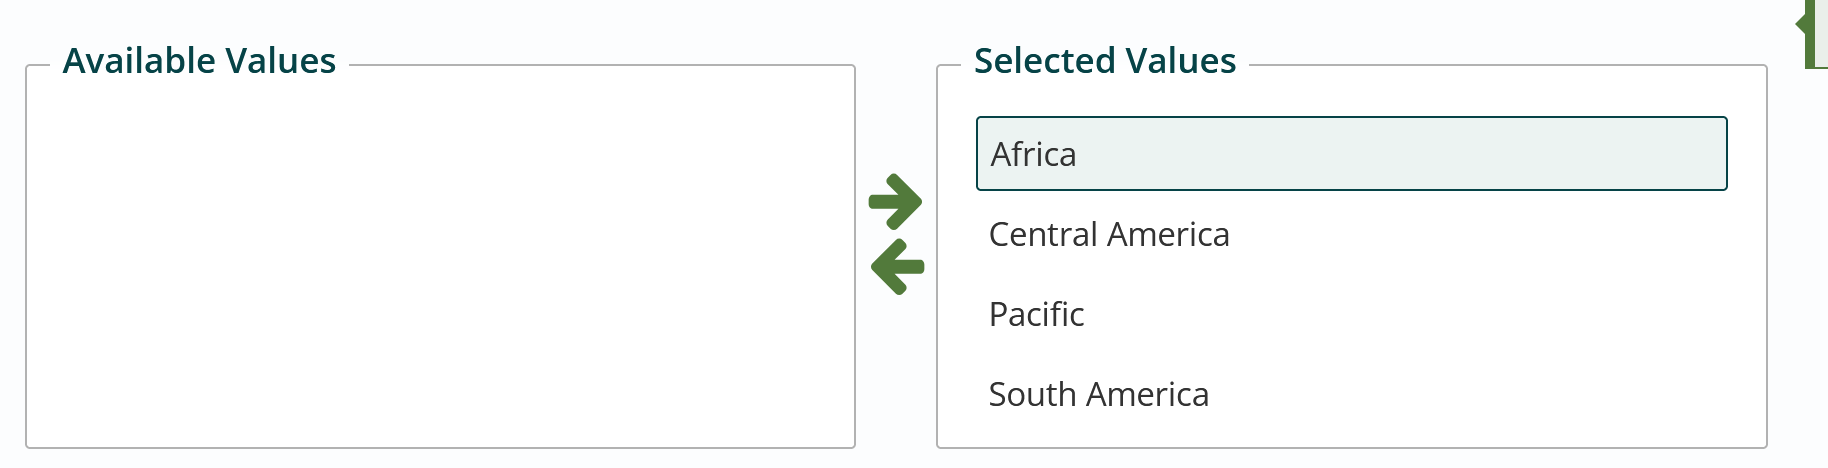
- Click to highlight each value you wish to select.
- Click the green arrow or double click to make your selection. The highlighted values will display under Selected Values.
- To delete a Selected Value, just double click on it.
- Click Save or Publish from the App Ribbon to retain changes.
Add a Tag and Attributes
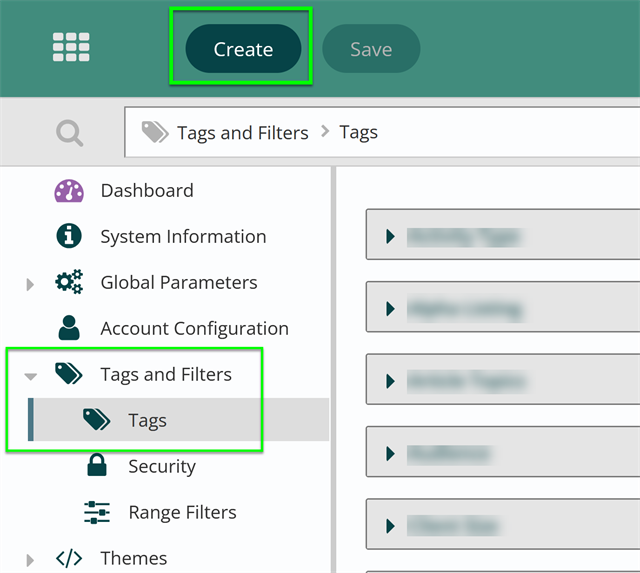
- Open the Titan Administration module.
- Click on Tags and Filters > Tags.
- Click the Create Button in the App Ribbon.
- Enter a name for the tag.

- Click Done.
- Find your newly created tag and click to expand.
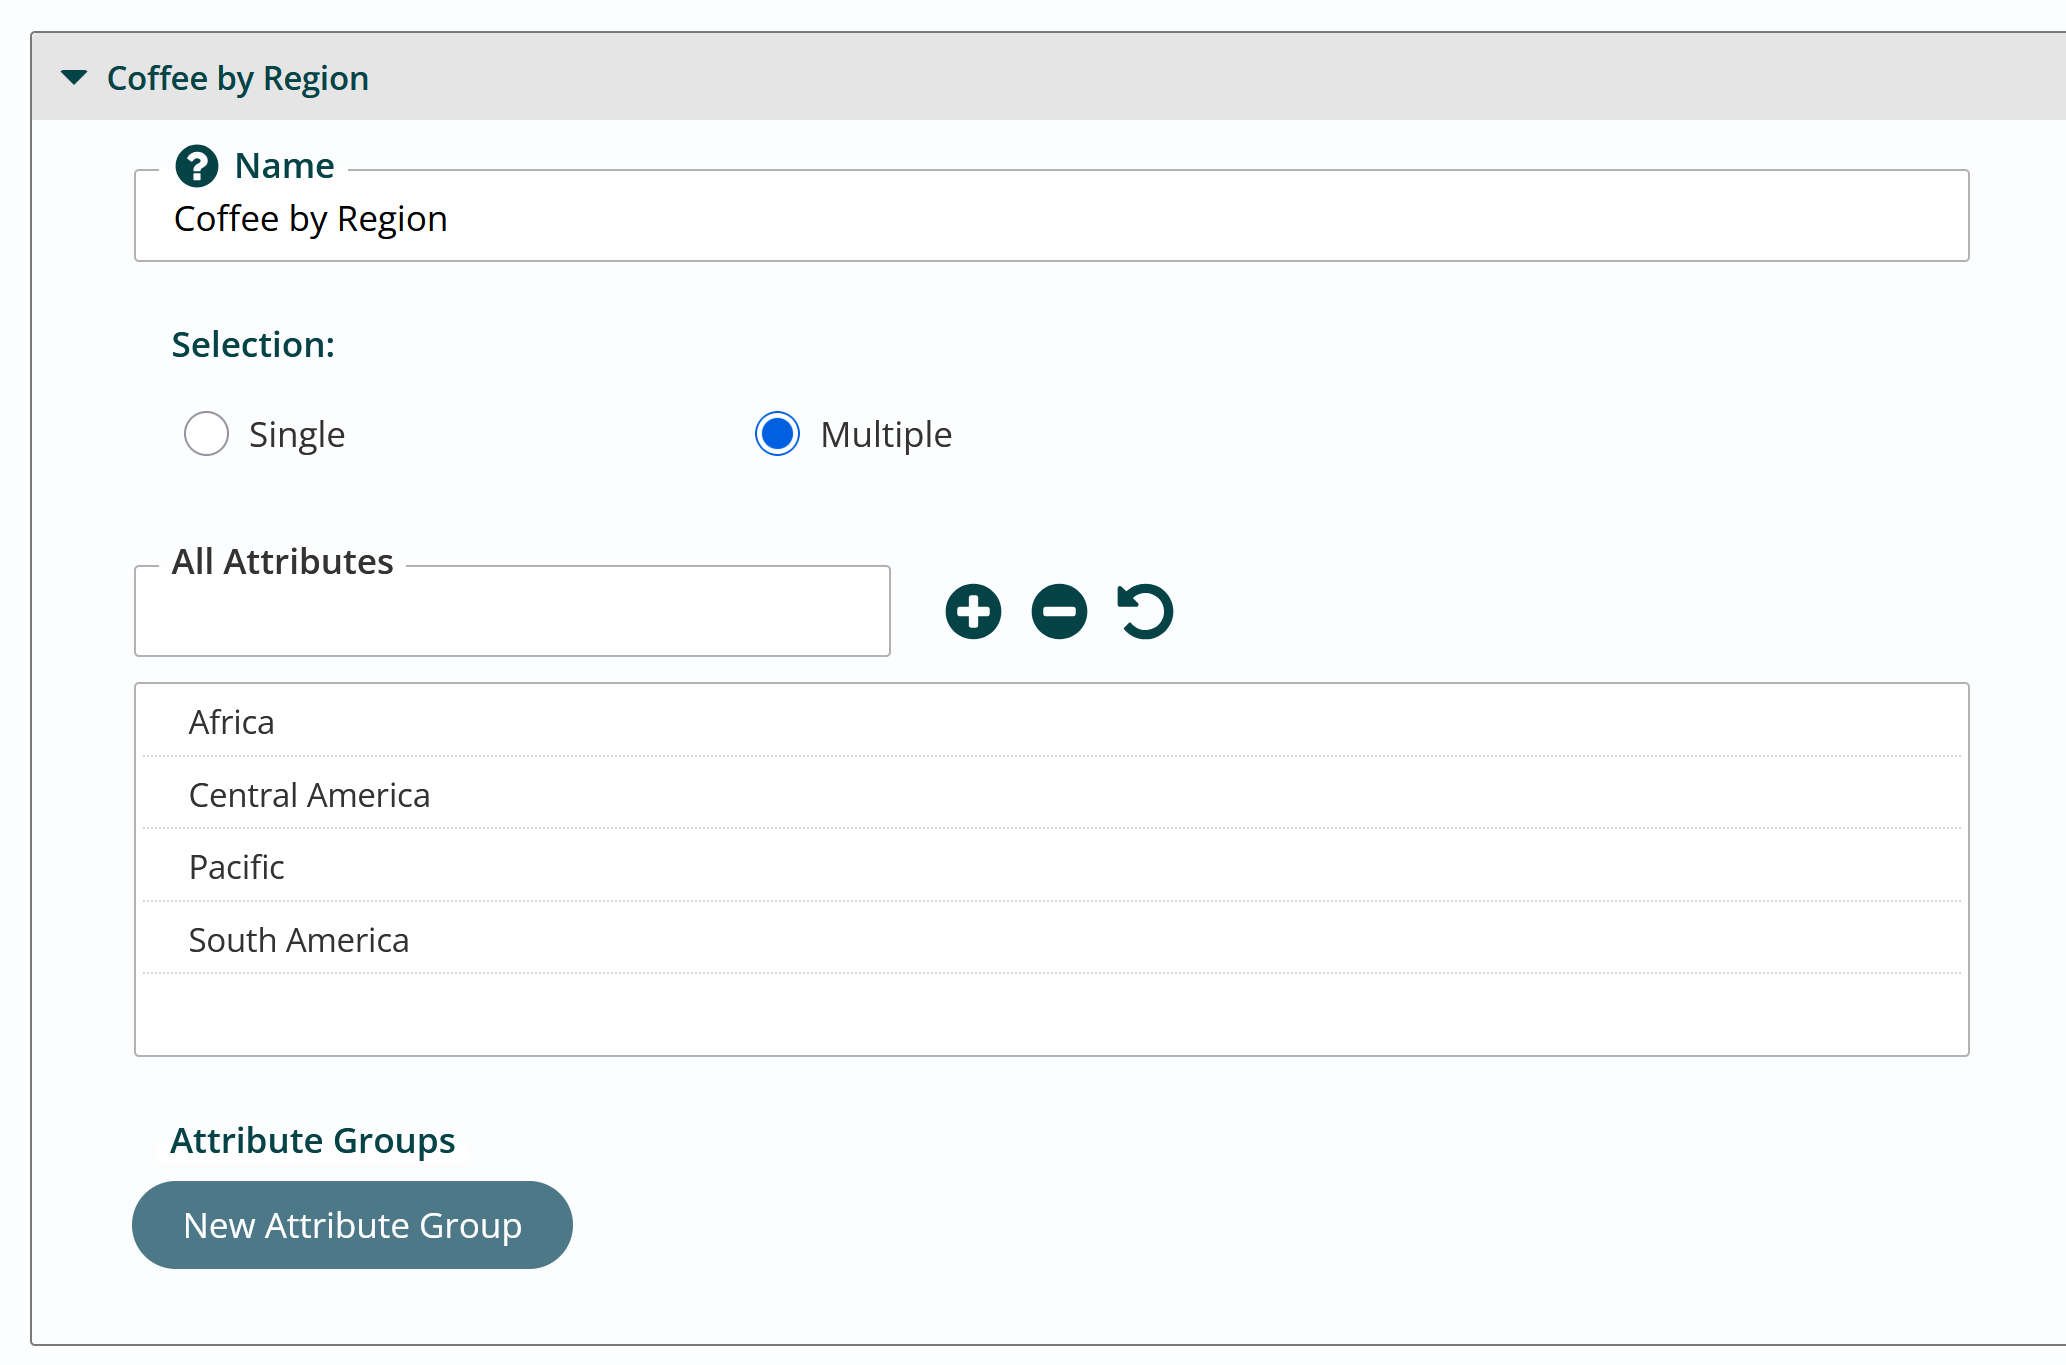
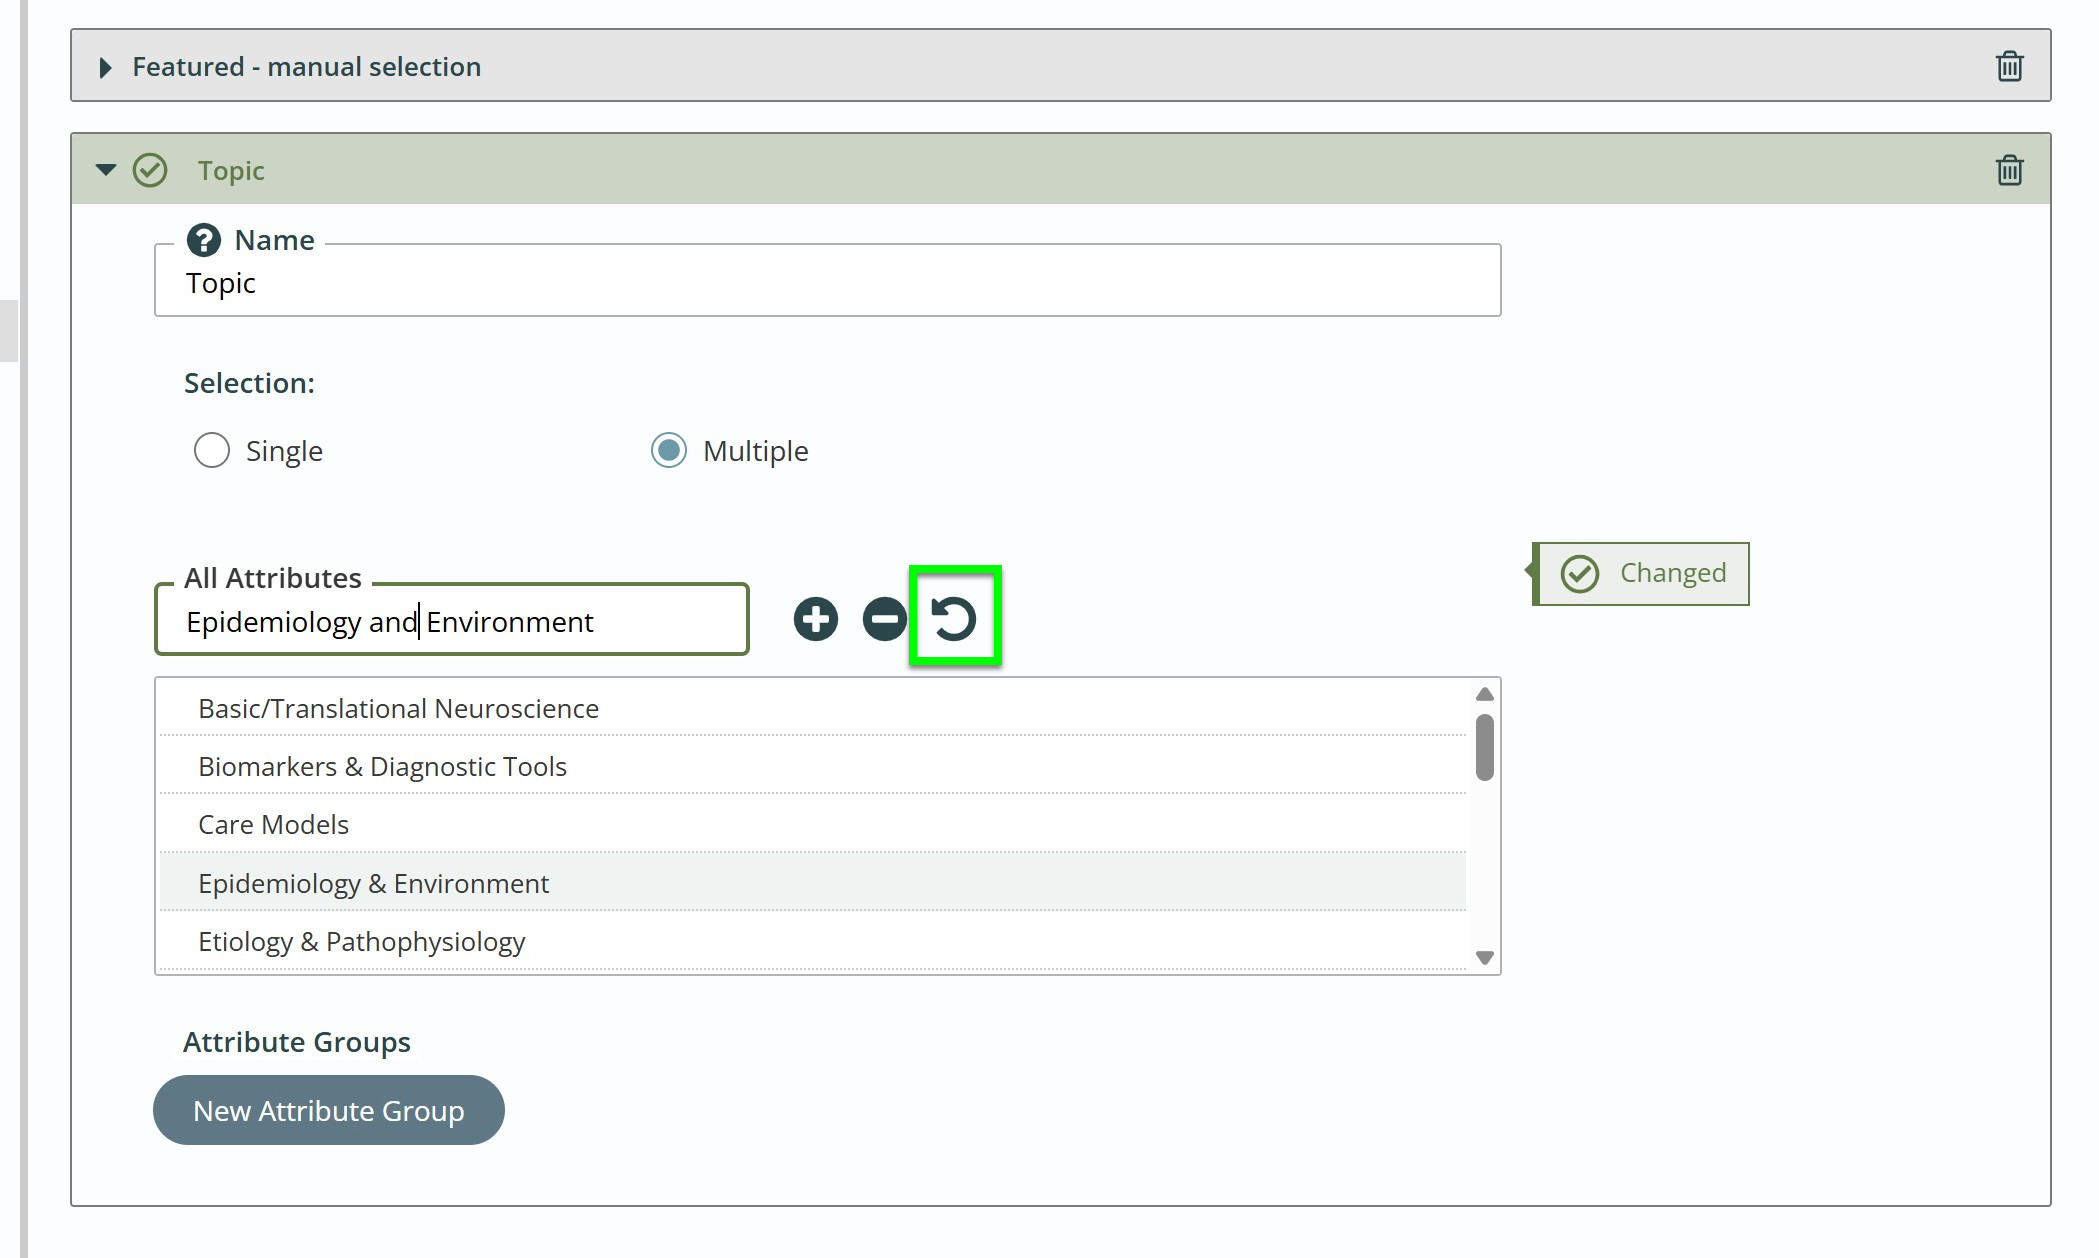
- Select Single or Multiple.
- Using a single tag setting will allow you to use only 1 attribute value when tagging content.
- Multiple tag setting will allow you to use more than 1 of the attribute values when tagging content.
- Add an attribute by entering the name in All Attributes and hitting Enter or the “+”. Attributes will automatically be sorted alphabetically. If you would like attributes organized in a different manner, you will need to create an Attribute Group.
- To update an existing attribute, click it and the attribute will appear in the All Attributes field. Update the text as needed and click the Refresh icon.
- To delete an attribute, click it so it appears in the All Attributes field and then click the minus icon.
- Click Save from the App Ribbon to retain changes.
- Refresh the workstation to make any changes show immediately.

Create a Tag Attributes Group
Use Tag Attribute groups to create a smaller subgroup of attributes, or to organize attributes in a different way than alphabetically, which is how they are organized by default.
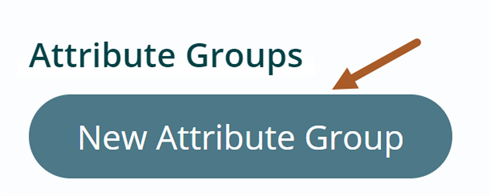
- Click to create a new attribute group.
- Enter a name for the Attributes Group.
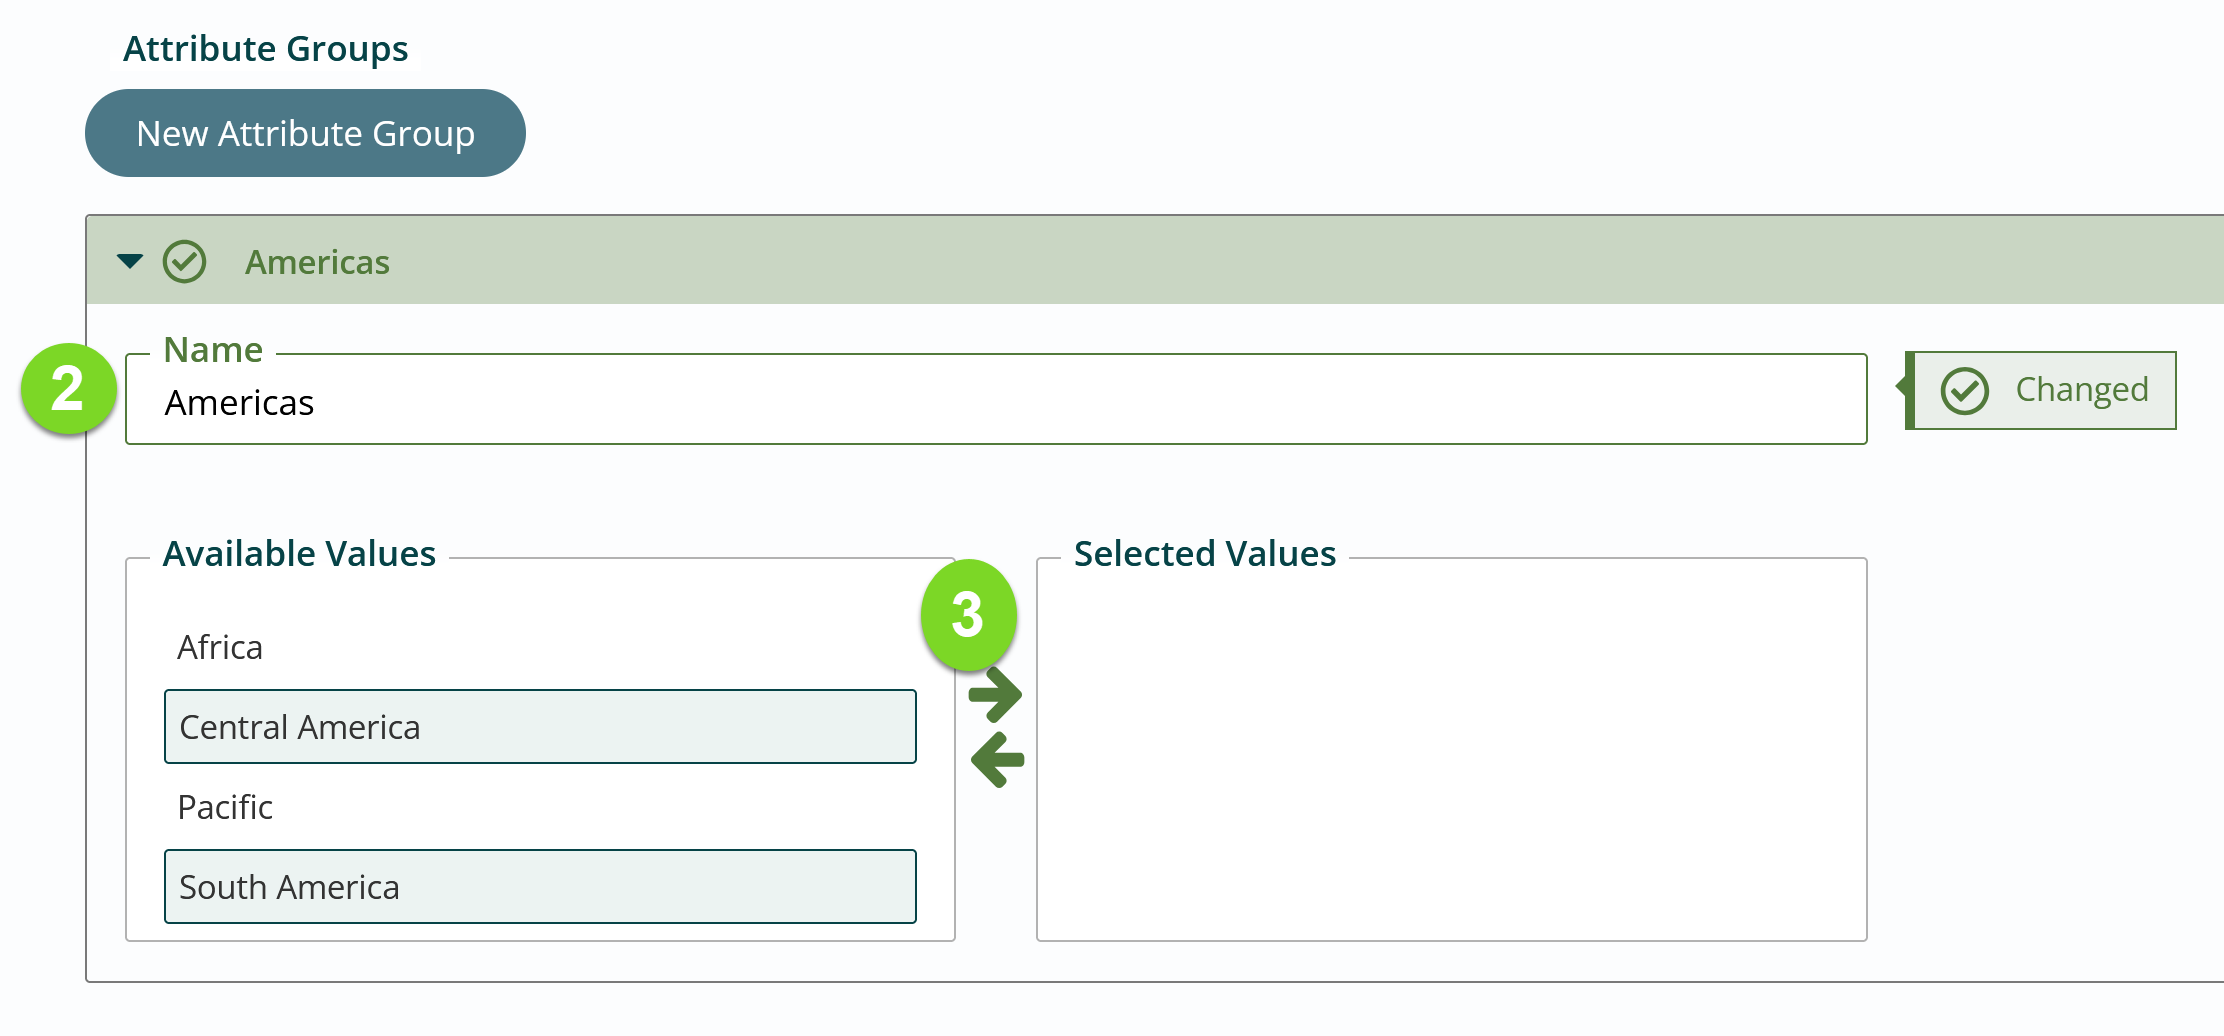
- Highlight item(s) from the Available Values list and click the green arrow to place in the Selected Values list.
- Values moved simultaneously to Selected Values get organized in alphabetical order. Drag a value up or down to reorganize the list. If an additional value is added to Selected Values later it will be added to the bottom of the list.
- Click Save from the App Ribbon to retain changes.
Activate or Inactivate a Tag for a Content Site, File Pile, or Data Site
Tags must be Active to be used on the site.
- Open the Titan Administration module.
- Click to expand Content Sites. This will display list of globes in your instance.
- Click on the site Globe you want to activate the tag for.
- Click on the Tags tab to display list of tags in right pane.
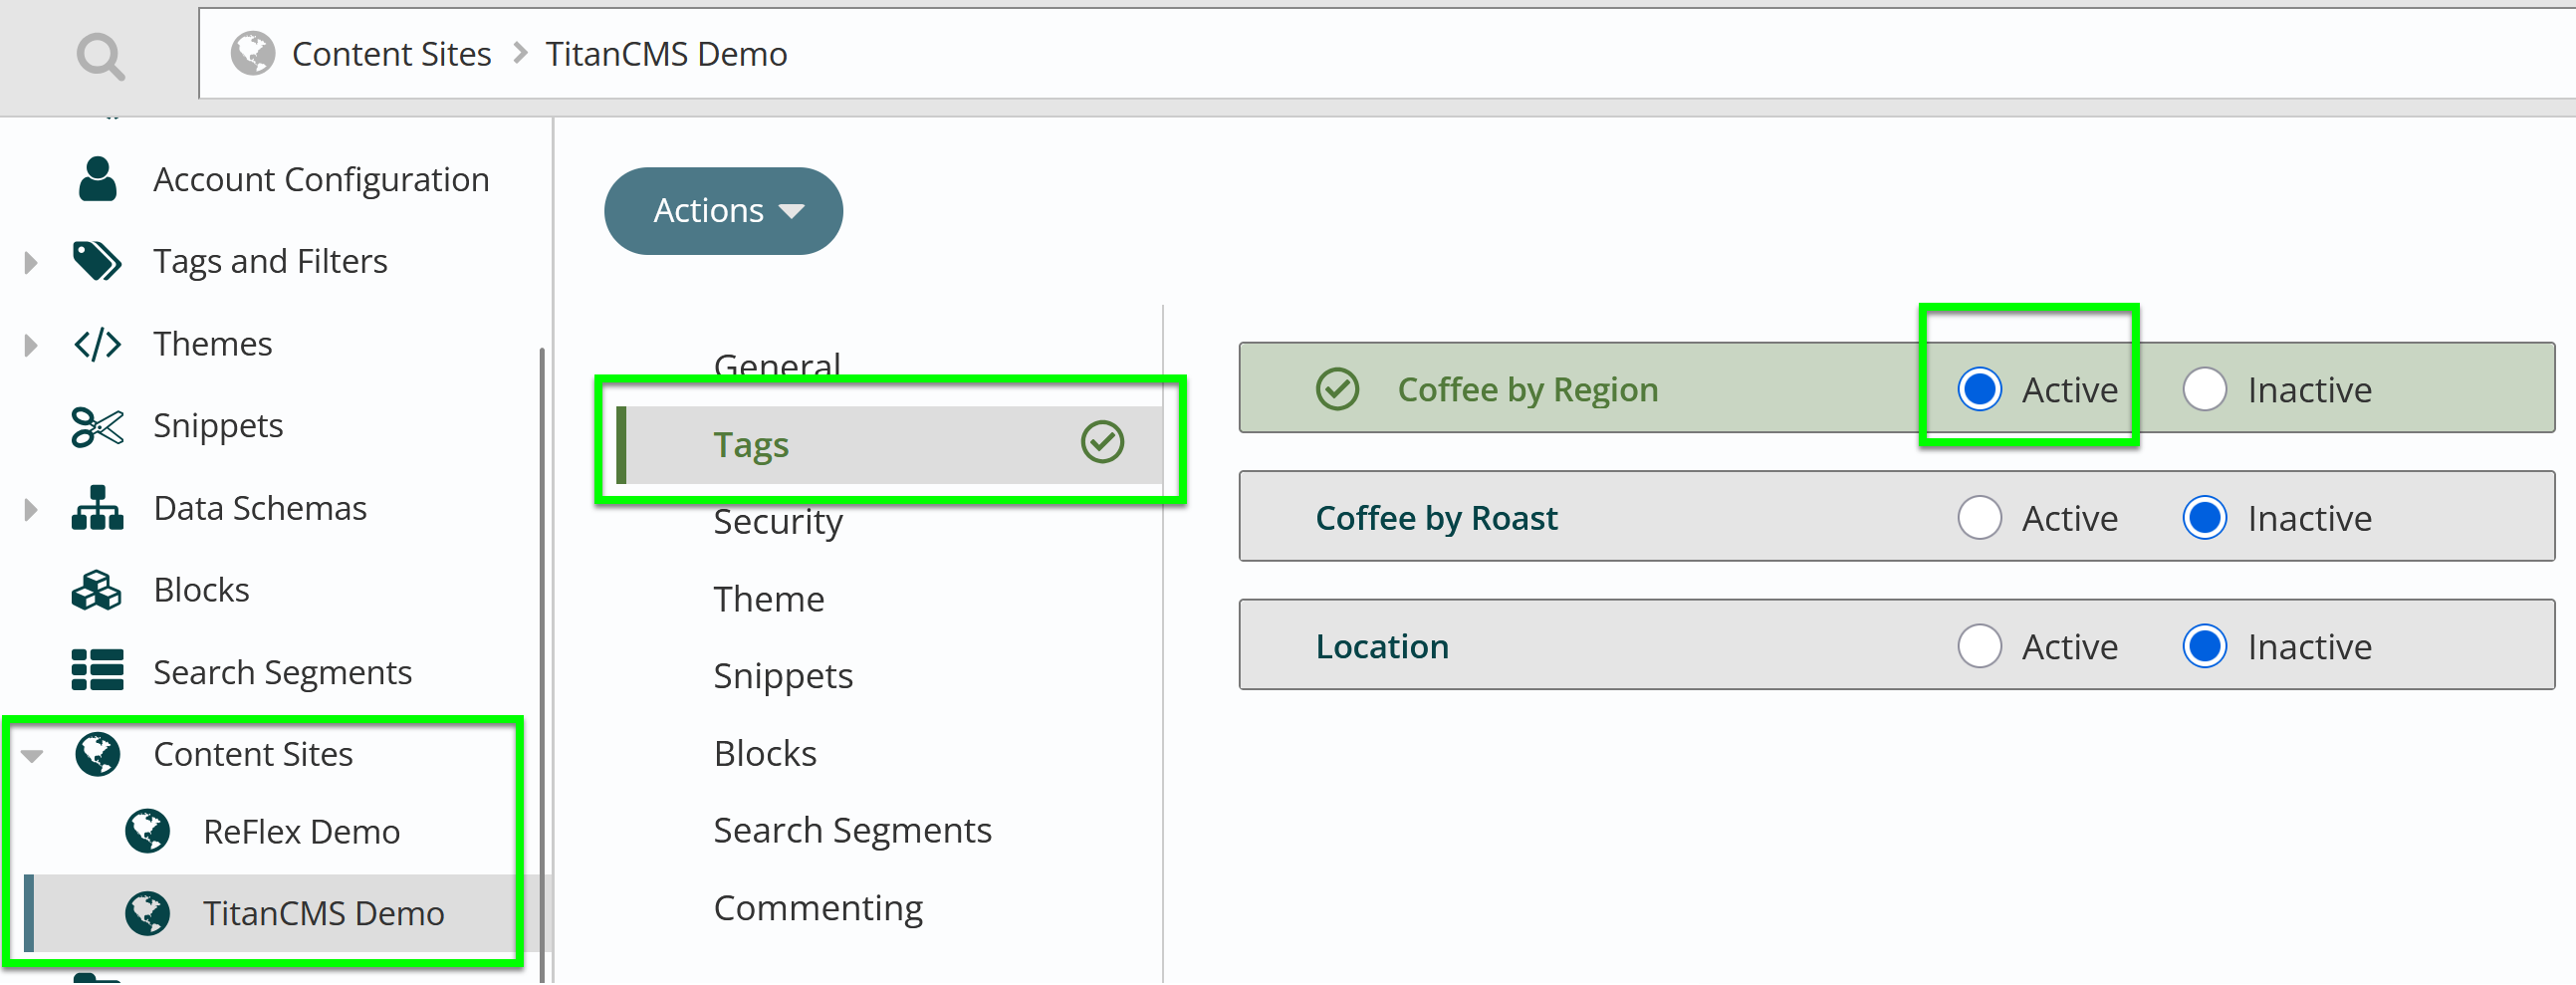
- Click Active for the Tag you wish to use on your site. Click Inactive for any tags you wish to stop using.
- Click Save from the App Ribbon to retain changes.
Get Support
Expert Titan CMS Support is just a phone call or email away!
Titan CMS Help Desk
9a.m.-5p.m. CT Mon-Fri
Tel: 414-914-9200
Email: [email protected]