Photo Block Overview
The Photo Block offers the ability to feature a photo gallery, displaying images from a file pile folder.

Add A Photo Block
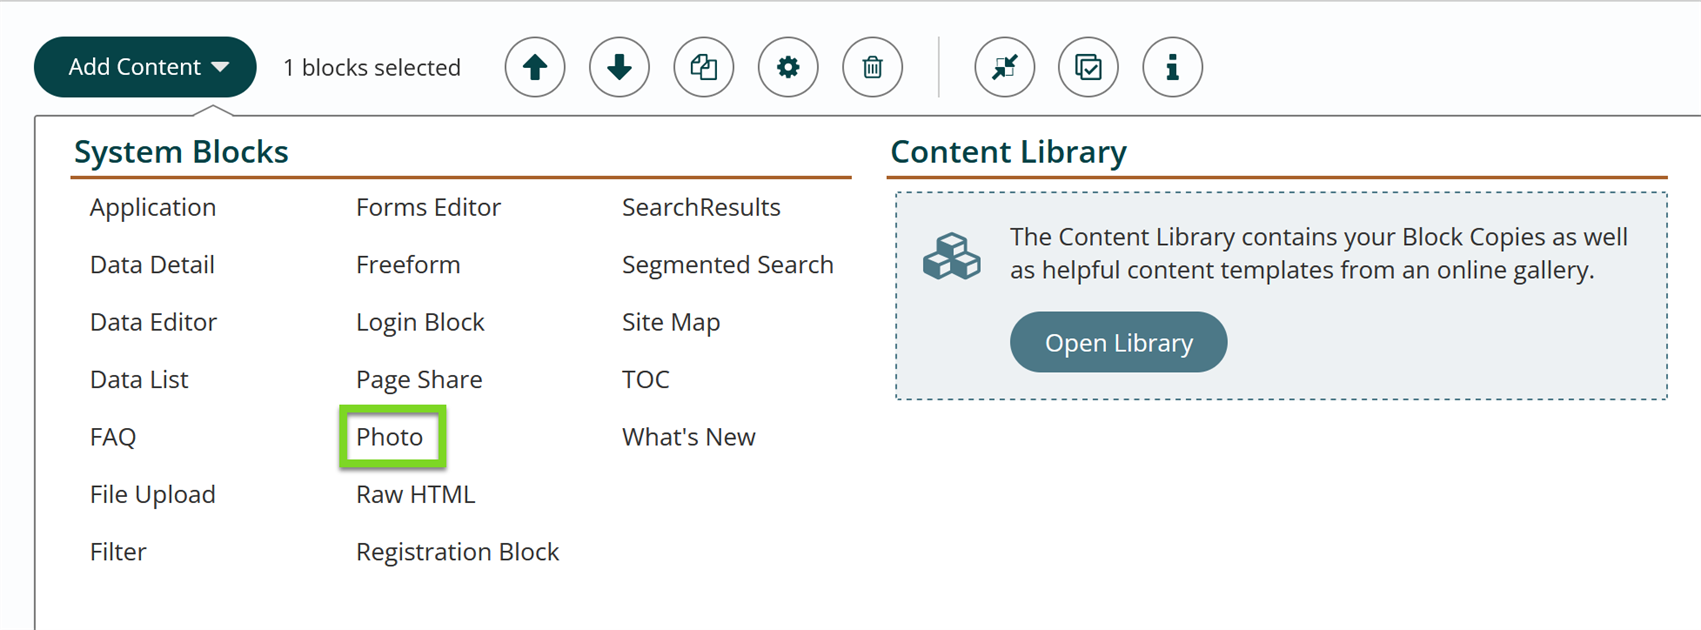
- Click the Add Content button.
- Select Photo.
- Configure your Photo block.
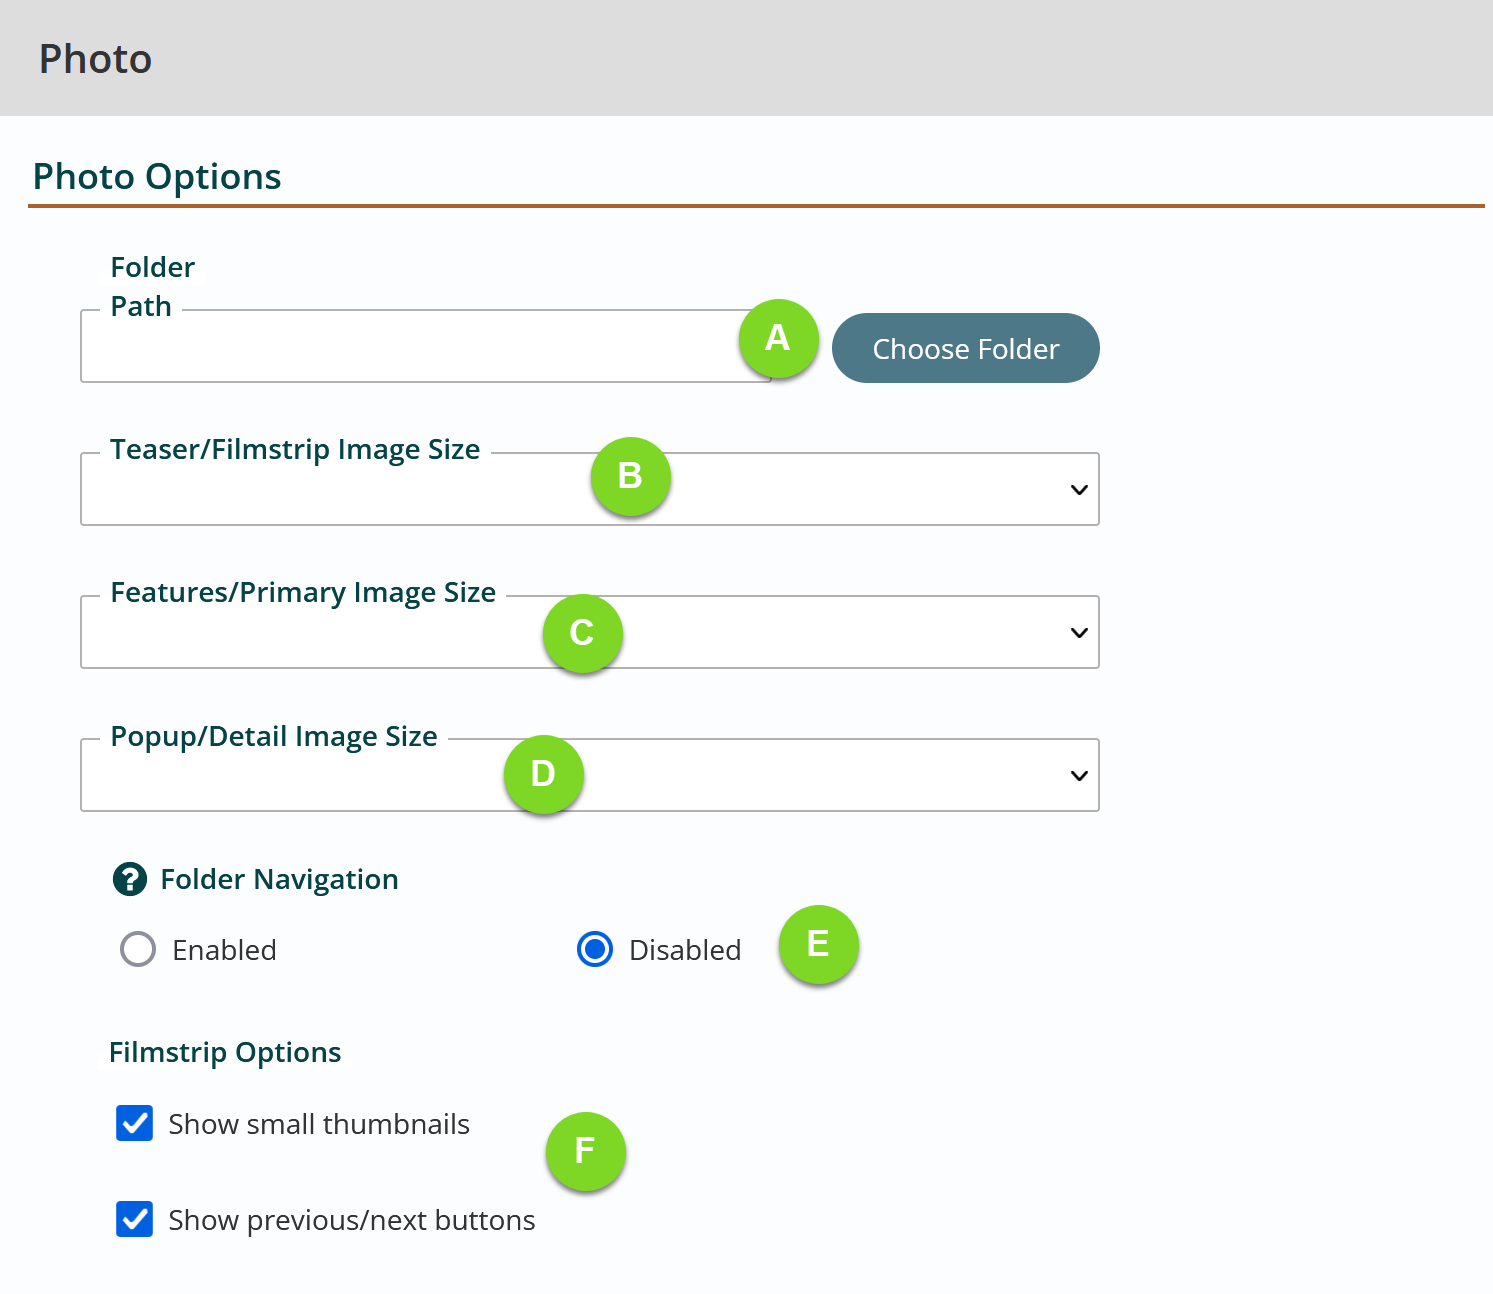
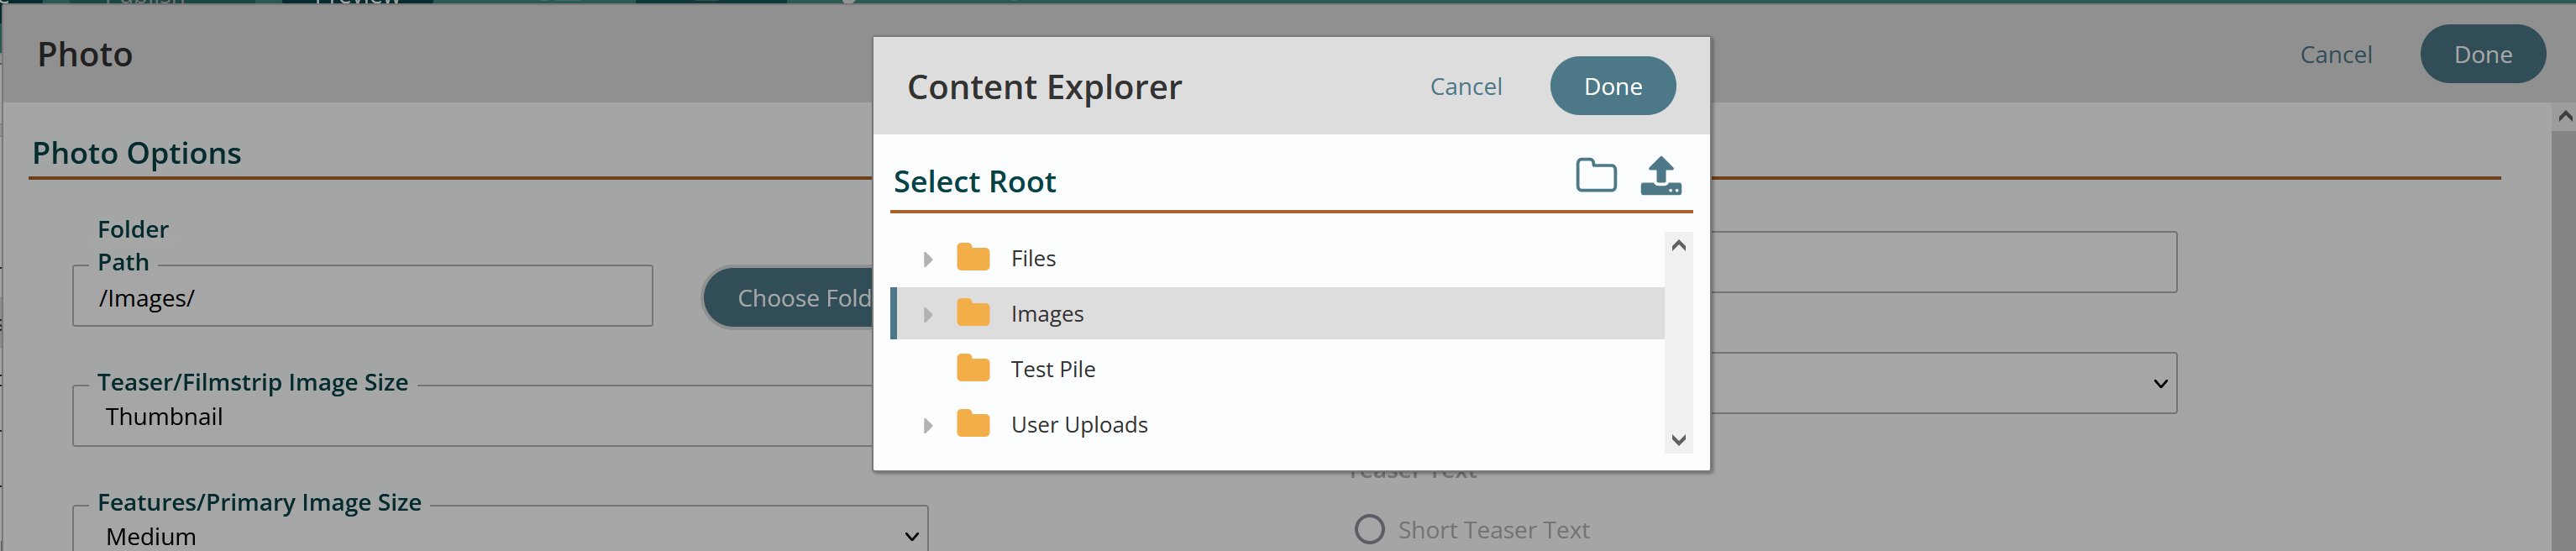
- Click the Choose Folder button to open the Content Explorer. Select the folder(s) where photos are stored in TitanCMS workstation. By selecting the folder, the sizes of Thumbnail, Small, Medium and Large will auto populate the Image Size drop downs.
- Set the size selections for Teaser/Filmstrip Image Size:
- Thumbnail (default value)
- Large
- Medium
- Small
- Set the size selections for Features/Primary Image Size:
- Medium (default value)
- Large
- Small
- Thumbnail
- Set the size selections for Popup/Detail Image Size:
- Large (default value)
- No Large Image (Website display, clicking image will not display a pop up)
- Original
- Medium
- Small
- Thumbnail
- Select if you'll have Folder Navigation (enable/disable). This option requires that the File Pile be configured for folder navigation in Titan Admin Workstation. This association will map all folders within the selected file pile to this block. The default is disabled.
- Determine Filmstrip Options:
- Show small thumbnails - default checked
- Show Previous/Next Buttons - default checked
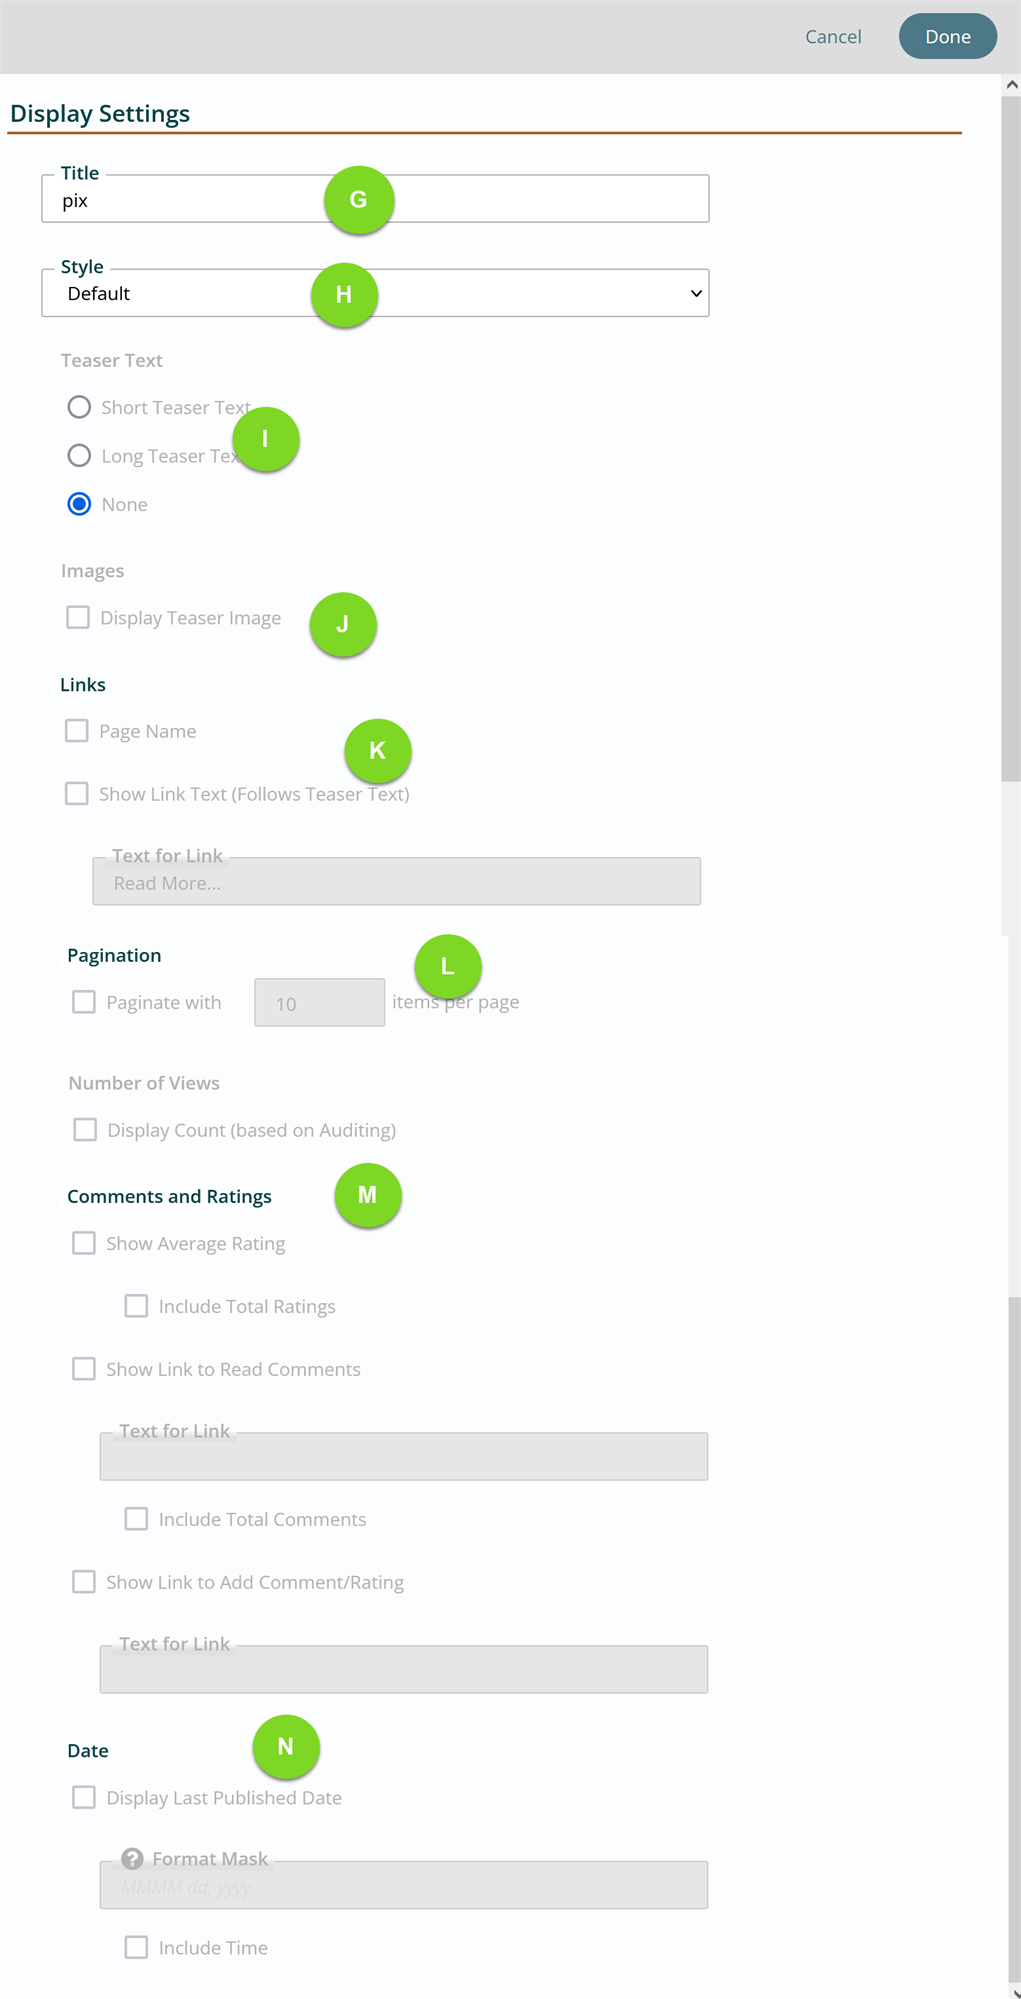
- Set the Display Options for Add a Title for Photos Block.
- Select Style
- Select Teaser Text
- Display or hide Teaser Images
- Configure link properties
- Select Pagination options.
- Select Number of Views - Auditing needs to be configured. Check if you'd like retain statistics of views and show in photo display.
- Select Comments and Ratings.
- Select Date options.
- Click the Choose Folder button to open the Content Explorer. Select the folder(s) where photos are stored in TitanCMS workstation. By selecting the folder, the sizes of Thumbnail, Small, Medium and Large will auto populate the Image Size drop downs.
- Click Done.
- Click PUBLISH in the App Ribbon to retain changes.
Get Support
Expert Titan CMS Support is just a phone call or email away!
Titan CMS Help Desk
9a.m.-5p.m. CT Mon-Fri
Tel: 414-914-9200
Email: [email protected]